
In the following steps, you will learn how to create a detailed Office Chair illustration. The Pen Tool (P) is the mostly used tool in this tutorial. We’ll continue to use some techniques (Clipping Mask, Blend, Gradient on Stroke…) and some effects (Gaussian Blur, Craquelure, Drop Shadow) to make the chair look more realistic. So let’s begin!
(50gram)
Difficulty: IntermediateRequirements: Adobe Illustrator
What will you get?
- Instant download of PDF e-book (57 pages, 122 steps)
- Comes with Ai file for easy reference
- Detailed step by step tutorial to draw a nice realistic Office Chair
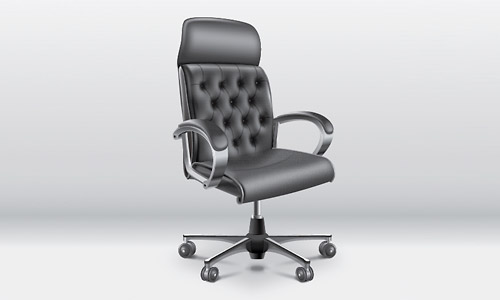
Tutorial Preview:
Create the Seat Post
67. Now create an object and then fill it with the linear gradient.

68. Pick the Ellipse Tool (L) and use this tool to create an object as shown below. Next, fill it with the linear gradient and then send the result to back.

69. While the result is selected, duplicate it twice and then press (Ctrl +3) to hide a copy. Reselect the remaining copy and move it to 7px down. Next, select two newly created objects and go to the Object Menu > Blend > Blend Options. Enter the data as shown below and then click OK. Go to the Object Menu > Blend > Make (Ctrl +Alt +B).

70. Press (Ctrl +Shift +3) to show the object hidden in the previous step. Replace the existing color with a new linear gradient as shown below.

71. Continue with the Ellipse Tool (L). Use this tool to create an object as shown in the first image and then fill it with the linear gradient. Next duplicate the result and then hide the copy (Ctrl +3).

72. Reselect the newly created ellipse object and go to the Object Menu > Transform > Scale. Check in the Uniform and enter 130% in the Scale Text Box and then click Copy. Move the result to 37px down. Reselect the two newly created objects and go to the Object Menu > Blend > Blend Options. Enter the data as shown below and then click OK. Then go to the Object Menu > Blend > Make (Ctrl +Alt +B).

73. Press (Ctrl +Shift +3) to show the object hidden in the previous step. Next replace the existing color with a new linear gradient shown below.

... end of preview. Sign up for premium membership to read the whole tutorial!

