

Need more tips on drawing vehicles in illustrator? John Urban will show you how to draw a sleek vector racing bike in illustrator in this new premium tutorial. He will start with a pencil sketch and show you how he turns it into a full blown detailed illustration. You will learn various techniques and tips to color the bike in this new tutorial.
So let’s get your engine started!
Requirements: Adobe Illustrator
What will you get?
- Instant download of PDF e-book (16 pages)
- Learn the techniques and tricks to draw a vector bike in 30 steps
- Comes with AI file for easy reference
Tutorial Preview:
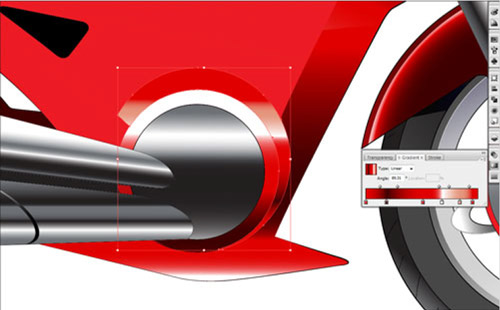
18. After you're done with the front fender, start by doing the body of the bike. Those shapes are in the same group, thus the gradient will be continuous on all of them as you can see in this screenshot.

19. I chose to have the light source from above but it also reflects from the ground. Keep that in mind when working on the body.
20.Continue working with the body, keep organizing yourself by following the main light source.

21. You should be getting used to return from time to time to your initial drawing, and if you applied values on it, check where the light is flowing and follow it with your gradients.

22. Now, step back and have a look for one minute at what you have acheived so far. As you can see, it's easier and easier to render the pieces because you already have a base and saved different types of gradients.

23. The tank is a very important piece and almost every time it defines the bike through its shape and dimensions. Mine has 3 planes and 3 different gradients with 3 directions. Don't be afraid to change directions if you want the surface to appear concave, it's better to change direction because the light will look different.

... end of preview. Sign up for premium membership to read the whole tutorial!


Hello John Urban, the result is Amazing…
Dude… share with us few Premium tutorial
I Like It This Bike Plz Provide Me Estedment this racing bikes
Regard,s Fully
Sanjay Singhal