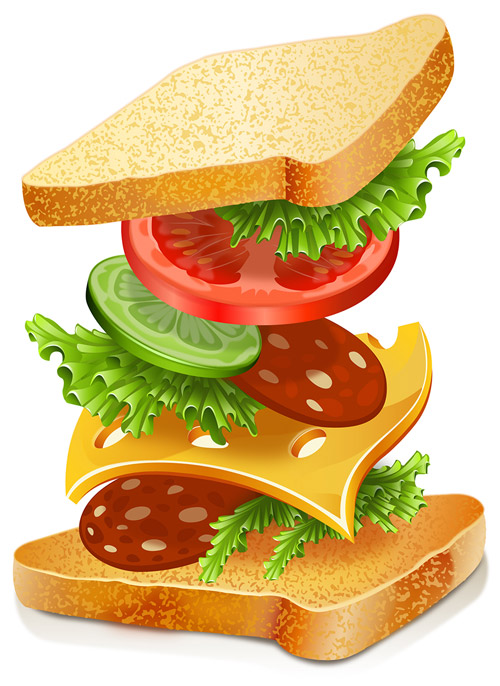

In this tutorial, we will illustrate a “Vegetable Sandwich”. Drawing a “Vegetable Sandwich” will fall in the “Real Life Objects Simulation” category. We will use Adobe Illustrator to create the Illustration. This will be compatible to any version above CS4. We will do the whole illustration by doing Partial Drawing of the individual components within it. We will do this because in our proposed drawing, each individual component will get overlapped by the component staying over it. So, by drawing only the visible parts we will be able to save our time.
Prerequisite for the tutorials: It has been assumed that the reader has the preliminary knowledge and efficiency on using the software Adobe Illustrator. Specifically with using Pen Tool and other Basic Drawing Tools; Basic Colouring Tools like Colour Pallets, Colour Swatches, and Gradient Tool&Mess Tool.
Remember that in all the positions wherein we are drawing using the Pen Tool, you can alternatively choose to use a Digital Pen-Tablet to draw the required lines, curves, shapes etc. or the Pencil Tool or Brush Tool (with appropriate settings).
Difficulty: IntermediateRequirements: Adobe Illustrator
What will you get?
- Instant download of PDF e-book (16 pages, 42 steps)
- Comes with Ai file for easy reference
- Detailed step by step tutorial to draw a nice realistic vegetable sandwich
Tutorial Preview:
Cucumber
23. Draw the cucumber using Pen Tool and put a Linear Gradient as appropriate.

24. Draw this using Pen Tool and put Radial Gradient as appropriate.

25. Combine the shapes in Step no. 1 & Step no. 2 to create this shape.

26. Draw the shape below. Use Gaussian Blur and decrease its Opacity.

27. Draw the shape below. Use Gaussian Blur and decrease its Opacity.

... end of preview. Sign up for premium membership to read the whole tutorial!

