

Create a realistic leather diary cover from scratch. You will learn interesting techniques on how to make a wrinkled leather texture on the cover using the Wrinkle Tool. Also, we’ll learn how to create a vector leather texture from a raster image, and apply it to the diary cover. Last but not least, we are going to create some decorative stitching using the Mesh Tool. So, let’s get started!
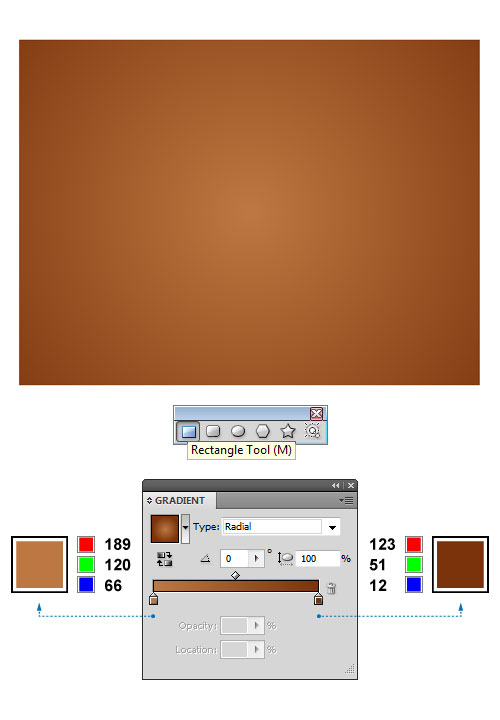
1. Open up a new document and set the dimensions of the Artboard to about 800 x 600px. Now grab the Rectangle Tool (M) and make a rectangle that is the same size as your artboard. Activate the Gradient Panel and fill the resulting shape with radial gradients as shown below: light brown (R=189, G=12,0 B=66) and dark brown (R=123, G=51, B=12).
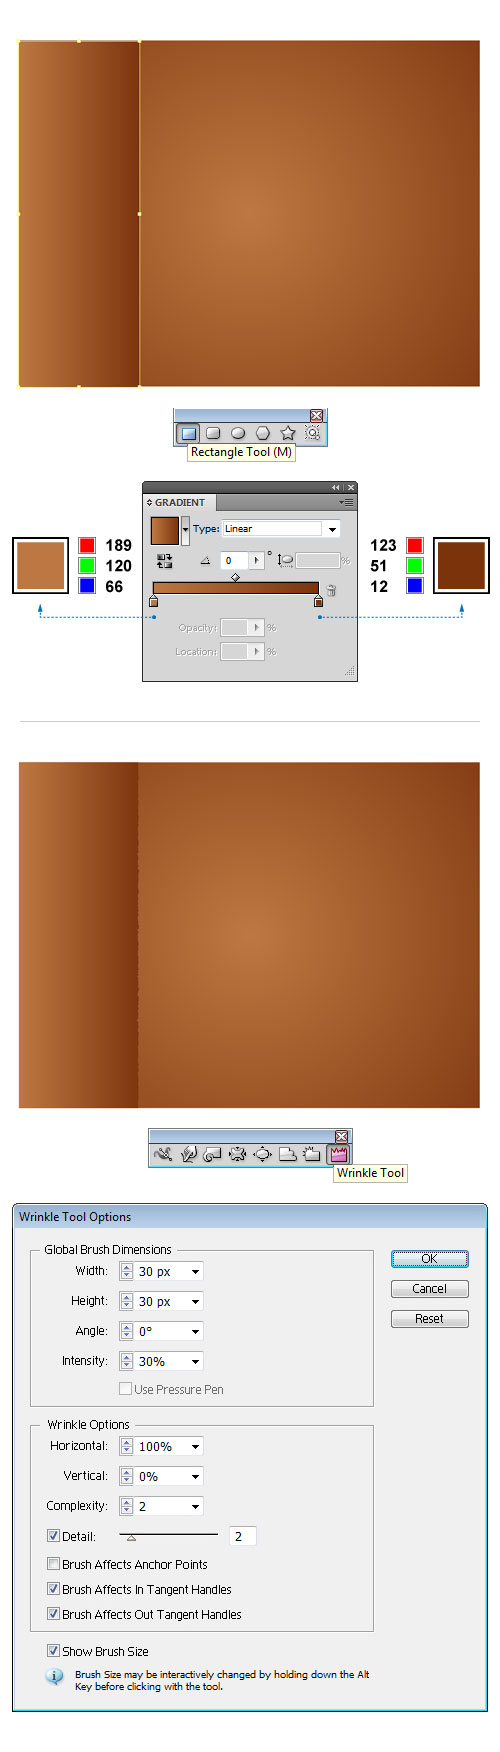
2. Let’s create a flap for the diary. Using the Rectangle Tool (M) create a new shape over the left side of the previous object (refer to the image). Now, go to the Gradient Panel and fill the selected object with linear gradients as follows: light brown (R=189, G=120, B=66) and dark brown (R=123, G=51, B=12). Then, double-click on the Wrinkle Tool from the Tools Panel on the left. When the Wrinkle Tool Options appear, enter the values shown on the image below and click OK. Now you can add some wrinkle-like details to the right edge of the selected object.
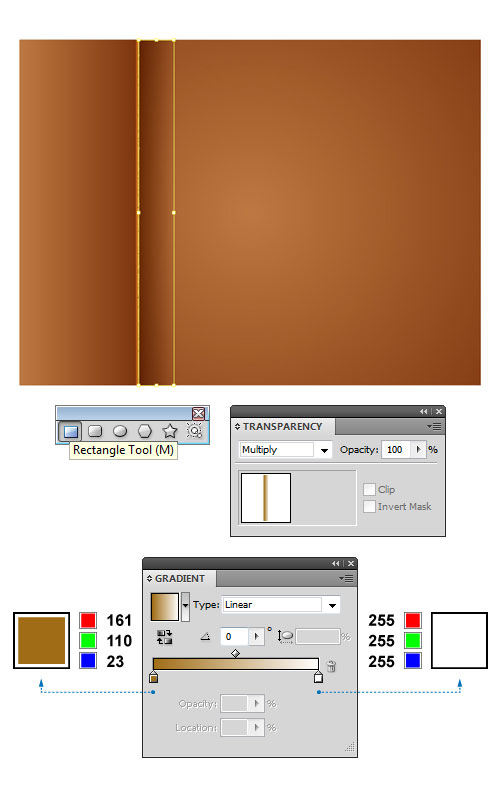
3. It’s time to create a shining edge effect. Pick the Line Segment Tool (\) and drag downward to create a vertical line along the right side of the object. Make sure to place the line near the wrinkled edge of the object. Select both objects, and in the Pathfinder Panel click on the Divide button, in order to get separated surfaces. Once done, open up the Gradient Panel and fill the resulting shape with linear gradients as shown below: light brown (R=161, G=110, B=23) and white (R=255, G=255, B=255). In the Transparency Panel change the Blending Mode to Hard Light (Opacity 85%).

4. Grab the Rectangle Tool (M) and create a rectangle next to the wrinkled edge. This will make the shadow of the flap. Open up the Gradient Panel and fill the object with the following linear gradients: light brown (R=161, G=110, B=23) and white (R=255, G=255, B=255). Change the Blending Mode to Multiply (Opacity 100%) in the Transparency Panel.
5. Let’s create a leather texture and apply it to the diary cover. I use Leather Texture Pack made by Mytherea. Paste the appropriate texture into the current document (File > Place) rotate it (if needed) and scale it down to approximately the size of artboard. Keep the object selected, and in the Control Panel click on the fly-out menu next to the Live Trace button. Open up the Tracing Options, apply the shown values and confirm with Trace. When done, press the Expand button to convert tracing object into paths.

6. While the object is still selected, set the Blending Mode to Overlay (Opacity 50%). Go to Object > Transform > Reflect and reflect it along the vertical axis, and hit Copy. Once we made the copy of the texture, go to Object > Transform > Reflect again, but now reflect the same texture along the horizontal axis, and hit OK. Open up the Transparency Panel and change the Blending Mode to Soft Light (Opacity 50%). When done, put the textures just over the diary cover as shown below.

7. We can apply some decorative stitching to the diary cover. First, grab the Rounded Rectangle Tool and make a shape, which dimensions should be set to about 14 x 1.5px. Now rotate the object a bit and pick any color you want. To multiply the objects, go to Effect > Distort & Transform > Transform and apply the shown values and hit OK. Keep the objects selected and go to Object > Expand Appearance to expand them. Ungroup the objects and pick the various colors from the Swatches Panel to fill the objects, as shown below.

8. Let’s create a shadow for our stitches. Pick the Pen Tool (P), draw a shape and set the dimensions to 22 x 38px. Keep the object selected, and choose white (R=255, G=255, B=255) in the Swatches panel to set the fill color. Once done, go to Effect > Stylize > Round Corners and in the Radius field enter 8.5px and press OK. Select Object > Expand Appearance to expand the object. Grab the Mesh Tool (U) and create two grid nodes as shown in the image below. Open up the Color Panel and replace the existing colors of the nodes with dark brown (R=96, G=56, B=19). In the Transparency Panel, change the Blending Mode to Multiply (Opacity 100%). Keep the object selected and use Send Backward (Ctrl+[) command to place the shadow behind the decorative stitches.

9. It’s time to create a simple stitching hole. Pick the Ellipse Tool (L), draw an ellipse and set the dimensions to about 30 x 8px. Open up the Swatches Panel and set the basic color to pure white. Pick the Mesh Tool (U) and create a grid node in the middle of the object. Select the grid node with the Direct Selection Tool (A) and fill it with black. When done, go to Effect > Blur > Gaussian Blur… and set it to 3 pixels for the Radius. In the Transparency Panel change the Blending Mode to Multiply (Opacity 100%). Place the stitching hole in its place.

10. Group all the objects (decorative stitch, shadow, stitching hole) and put them over the upper edge of the leather diary. To create multiple objects, go to Effect > Distort & Transform > Transform… and apply the shown values and hit OK. (westchestermachinery.com) Make a copy of the objects we have just created and move them to the left a bit. That’s it. I hope you’ve enjoyed this tutorial.
View the list of all 101 Illustrator special effects tricks at 101 Illustrator Special Effects.
