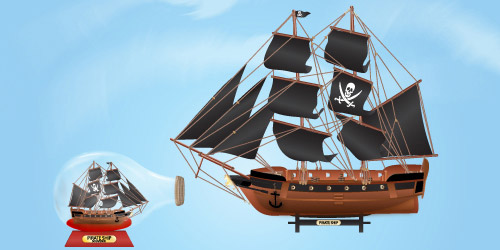

Create an attractive pirate ship inside a glass bottle in this illustrator tutorial! Learn how to draw a pirate ship souvenir in a glass bottle from scratch. You will also learn how to draw the ship’s hull, rope pulleys, sails, cannons, anchor, barrels, helm and the glass bottle in this tutorial.
Requirements: Adobe Illustrator
What will you get?
- Instant download of PDF e-book (25 pages)
- Detailed step by step tutorial
- Learn the techniques to draw a pirate ship in illustrator
- Learn to do rope brush and create realistic glass bottle effect
- Comes with Ai file for easy reference
Tutorial Preview:
18. Here are some examples on how to use the rope. Just draw paths between the mast and the yards and stroke them using the Rope Pattern Brush scaled to its right size. I also made another Rope Pattern Brush like above just with round ends for a round look and to fit better on top of the yards. I used this Round Rope Pattern Brush to stroke only the small paths, for the long ones use the first one made above. Now, draw a lightly curved path and stroke it using the Round Pattern Brush, Copy and Paste 2 more and arrange them next to each other, group and place them on top of the yards and on top of the mast like in the image below.

19. Next we will draw some rings to hold the rope. Take the ellipse Tool and draw a circle then use Offset Path to make smaller one inside. Select both and Subtract from shape area and Expand (the smaller circle should be on top). Colors used for the gradient are: (R=183, G=160, B=149), (R=211, G=194, B=174), (R=244, G=224, B=173) and (R=220, G=210, B=196). Make another ring in the same way and then draw a rectangle between them using the Rounded Rectangle Tool. Groupo all the shapes.

20.To draw the rope pulleys, draw an oval shape, Copy and Paste in front another oval and move it to the right and a bit up(the red one in the image) then Copy and Paste in front the first oval one more time and move to the right and up also (the second black one). Adjust the up and down points of the red oval to make the shape smaller. Next draw the small green oval and place it on top like the in the image below, then Copy and Paste in front 2 more because you will need them. Select both the middle oval and one of the small ovals and click Subtract from shape area and Expand. Do the same using the third oval and the other small oval that i said to copy earlier. Group all the shapes of the pulley and also save a copy of the small brown oval in the same group because you will need it later.

21. Here are some examples on how to use the rope pulleys. Rotate the pulleys depending on the direction of the rope and place it on top of the rope. To make like the rope is going through the pulley take the brown oval that I mentioned to save above and send it behind the rope.

In the image below you can see where to place the rings, all the ropes and the pulleys.

... end of preview. Sign up for premium membership to read the whole tutorial!


Nice looking ship, even Johnny Depp would be impressed.
its a great post, keep them coming.
i really enjoyed this tutorial
what a great post, love the look of the pirate ship, would be really nice for us to print that.
Wow. Great design and use of gradients. High quality stuff!
nice!!!!