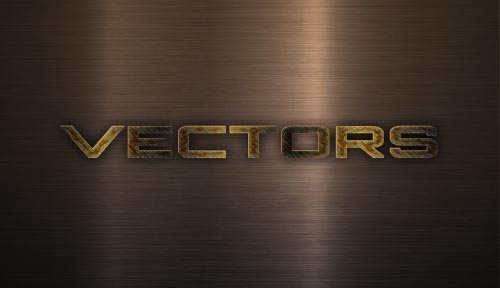

Let’s learn how to create a vector text effect on the metal brushed background. We’ll take advantage of the Appearance Panel and Graphic Styles to speed up the process and keep the text fully editable. We will also cover a process on how to create a realistic metal brushed texture using simple techniques like the Sponge, Transform Each, Gradient, Reflect etc.
1. Open up a new document, and set the Artboard dimensions to 800×600 px. Go to the Tools Panel and grab the Type Tool (T) and type some text of your choice (pick any color you want). The text effect will work with any font, but I suggest you to download Orbitron sans-serif typeface. Choose Black Font Style with a size of 70pt. While text is still selected, go to the Character Panel and increase the Horizontal Scale to around 150% to stretch type sideways. This create a more sleek and futuristic look.

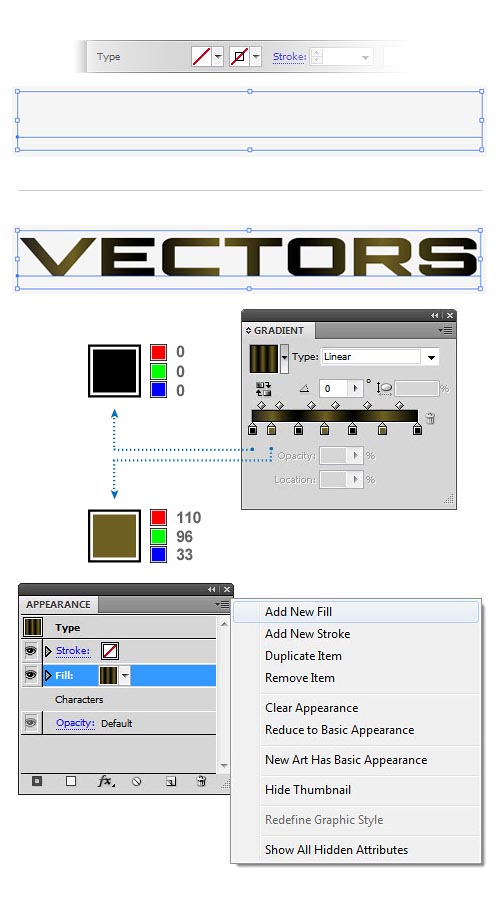
2. It’s time to create a rusty metal text effect. Remove any Fill or Stroke color and make sure nothing else is applied to the text yet. Turn on the Appearance Panel and from the fly-out menu and choose option “Add New Fill”. Once done, a new “Fill” attribute will appear in the Appearance Panel, just below the empty “Stroke” attribute. Open the Gradient Panel (Ctrl+F9) and give the text a gradient fill using alternating colors between black (R:0 G:0 B:0) and a brown (R:110 G:96 B:33).
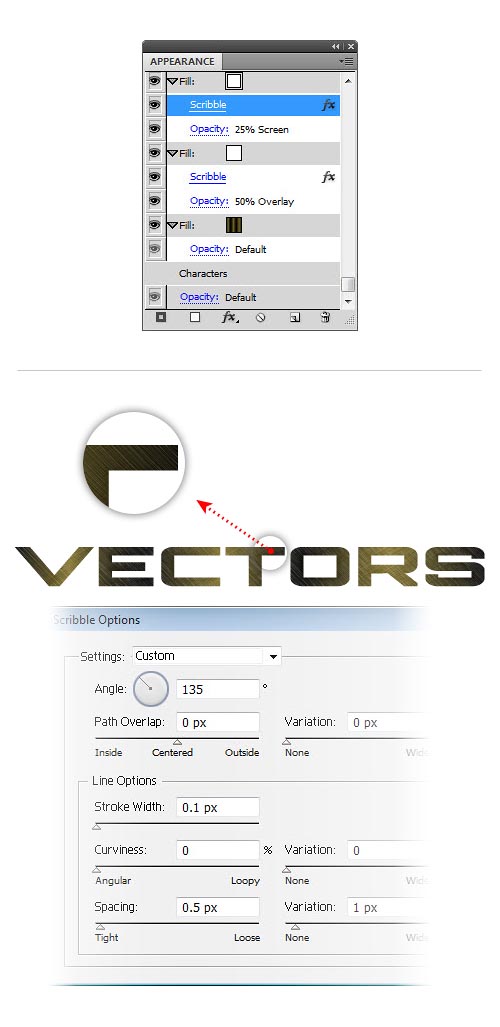
3. Select the “Fill” we created in the previous step and click the Duplicate Item button (click the drop down arrow at the right corner) to create another “Fill”. Turn on the Color Panel (F6) and replace the existing color with pure white (R:255 G:255 B:255). Keep this fill still highlighted, and go to Effect > Stylize > Scribble. Set the values as shown on the image below. Click on the toggling arrow on the left to reveal the content of that specific “Fill” attribute. We`ll find two sub-layers, the Scribble effect we just applied and the Opacity layer. Change the Opacity to 50% Overlay.

4. Duplicate the previous attribute the way we did in the step 3. Make sure this “Fill” is placed above everything else except the “Stroke” attribute. As you can see, we duplicated a “Fill” attribute along with the content hidden within it. Double-click on the Scribble Effect to bring up dialog box and we are free to edit the effect. Change the properties shown in the following image and press OK to keep the changes. Lower the Opacity to 25% Screen.
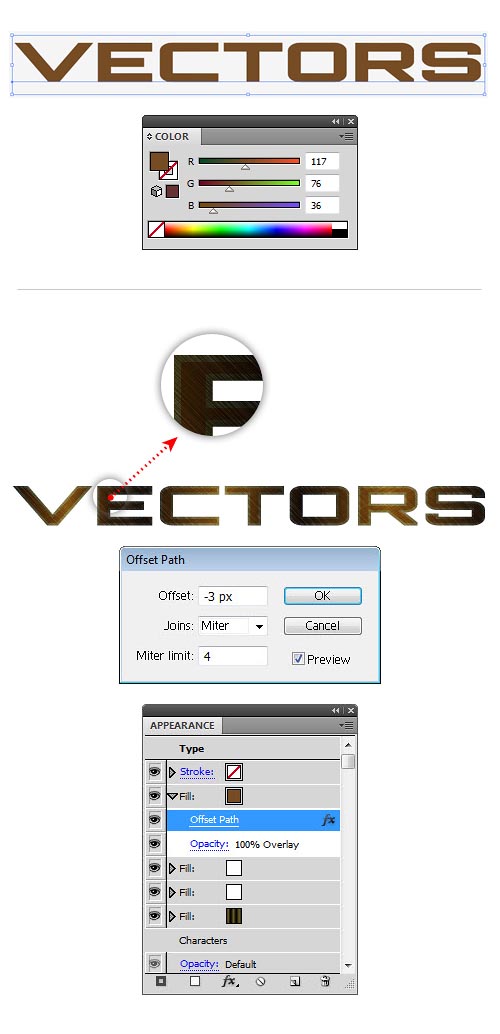
5. It’s time to create a new “Fill”. Copy the previous “Fill” and use the brown color (R:117 G:76 B:36) for that active attribute. So far, we have four “Fill” attributes and an empty “Stroke” attribute. First, we want to be sure that there is no any effect applied to our last “Fill”. If any stuff is still there, select it and click on Trash button to delete selected item. Now, make sure the attribute is still selected and go to Effect > Path > Offset Path and select an offset of approximately -3 px. Actually, we want this fill to be offset a bit from the edges of the original letters. When done, click the Opacity and change it to 100% Overlay.
6. We’ll make some drastic changes to this fill now. Select Effect > Distort & Transform > Roughen… and set the values you can see on the image below. Using this effect, we want to create those rust spots we can find on the eroded metal surface.
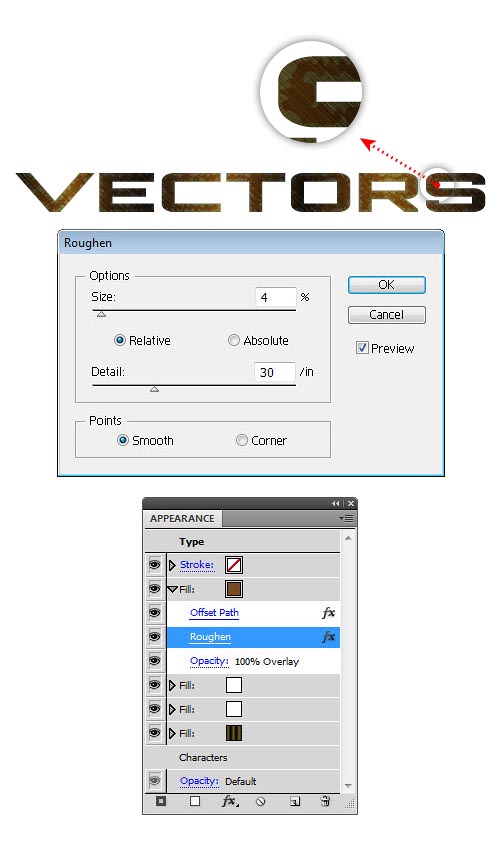
7. Let’s make some modifications on the brown “Fill”. The Roughen effect we have just applied will be automatically added beneath the Offset Path effect. To get the result we want to accomplish, we must place it on top of that fill. To change the stacking order within brown “Fill” attribute, drag the Roughen effect up and when you are satisfied, release the mouse button. To compare the changes refer to the close-up views.

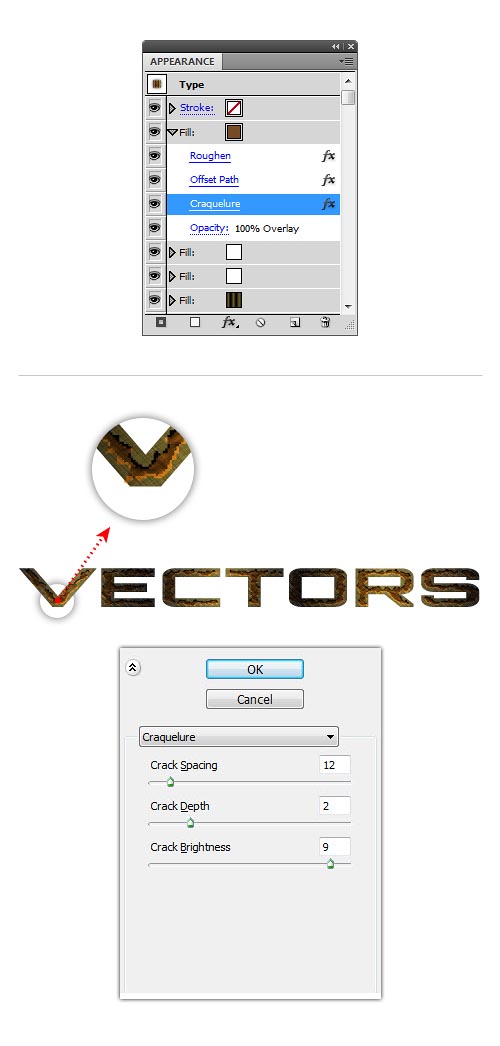
8. Now here’s the interesting part. To get the realistic surface, we need to achieve a sense of depth. To do this, go to Effect > Texture> Craquelure and type the values manually. This effect is great because its relief surface producing a fine crack patterns that follow the contours of the object we are working on.
9. The next step is to add a realism to the eroded surface. Our rusty effect is not yet realistic and the reason is obvious. The edges look too sharp. Select Effect > Stylize > Feather and set the distance at 3px in order to get nice smooth edges.

10. We cannot leave our text effect unfinished, because it looks kinda flat. It will look completely different if we add some highlight parts at the back of our text. First, click on the fly-out menu and select “Add New Fill”. You will need to drag this fill layer to the bottom of the Appearance Panel so that it appears below everything else we’ve already applied to the text. Don`t forget to apply a color (R:163 G:124 B:82) to that new “Fill” attribute. Then, go to Effect > Distort & Transform > Transform and enter the values as shown.

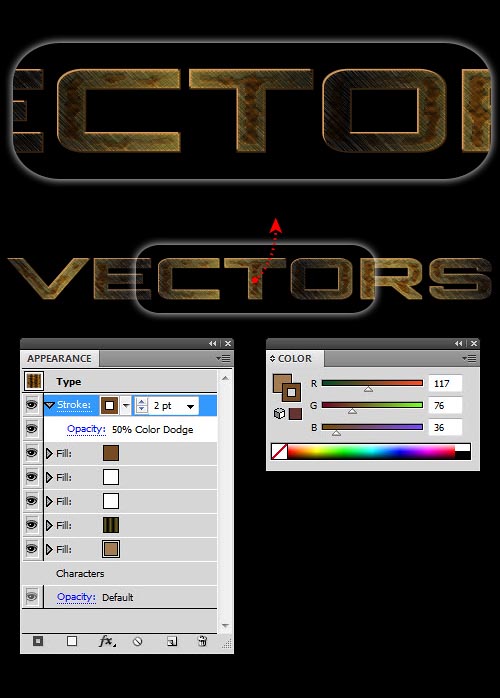
11. We’re going to enhance the text visibility a bit. Click on the “Stroke” attribute and fill it with brown color (R:117 G:76 B:36). Click on the toggling arrow to reveal the sub-layer and change the Opacity to 50% Color Dodge.
12. Our text effect wouldn’t seem complete without nice metal background. Create a new layer and name it “Brushed metal background”. On that new layer (should be placed below the text layer) create a rectangle using the Rectangle Tool (M) and fill it with linear gradient, (R:111 G:85 B:64) and (R:0 G:0 B:0). Remember to create a rectangle that is the same size as the Artboard we have created in step 1. Now enable Smart Guides (Ctrl+U) that will help us align the rectangle and the Artboard.

13. Duplicate the rectangle shape from the previous step and fill this copy only with black (R:0 G:0 B:0). We are going to create a metal brushed surface that has small scratches all running in the same direction. Keep selected the black shape and go to Effect > Artistic >Sponge and enter the data shown in the following image.

14. When you apply Photoshop effect, you actually create a raster image. We want to turn this shape into vector objects. Select Object > Expand Appearance to expand the object. When the Live Trace command appears click on it. Our object is black again, but don`t worry, we`ll fix it immediately. Open the Tracing options dialog, enter the values shown in the following image and press Trace. Click on the Expand button to convert tracing shape into fully vector-based objects.

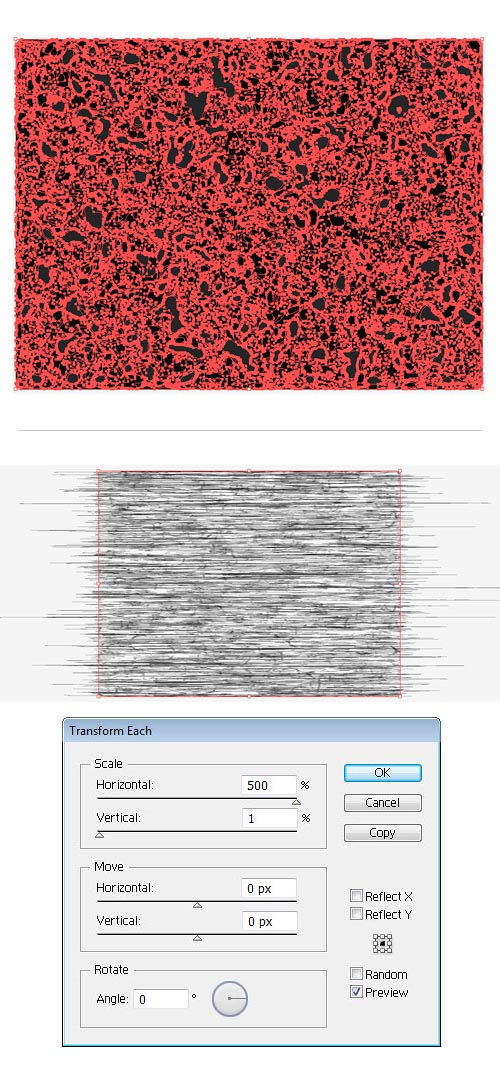
15. Let`s create first set of metal scratches. Ungroup the traced object first (Shift+Ctrl+G). Once done, select those separated objects and go to Object > Transform > Transform Each, enter the values shown on the image below. As you can see, we’re actually increasing the size of every single object horizontally by 500%, while at the same time reducing the size vertically to 1% of the original size.
16. Keep the object still selected and open the Color Panel (F6) in order to change the fill into dark grey (R:86 G:84 B:79). When you are satisfied, group the objects again (Ctrl+G).
Note: You may find some lines extremely long; if it bothers you, just get rid of them.

17. Duplicate the rectangle we’ve created in step 12 and bring it above our new texture. Select both and right-click on selected surface. Now make a clipping mask, so we can hide parts that exceed the background boundaries. Activate the Transparency Panel (Shift+Ctrl+F10) and change the Blending Mode to Screen (Opacity 15%). Place that object just above the first rectangle shape.
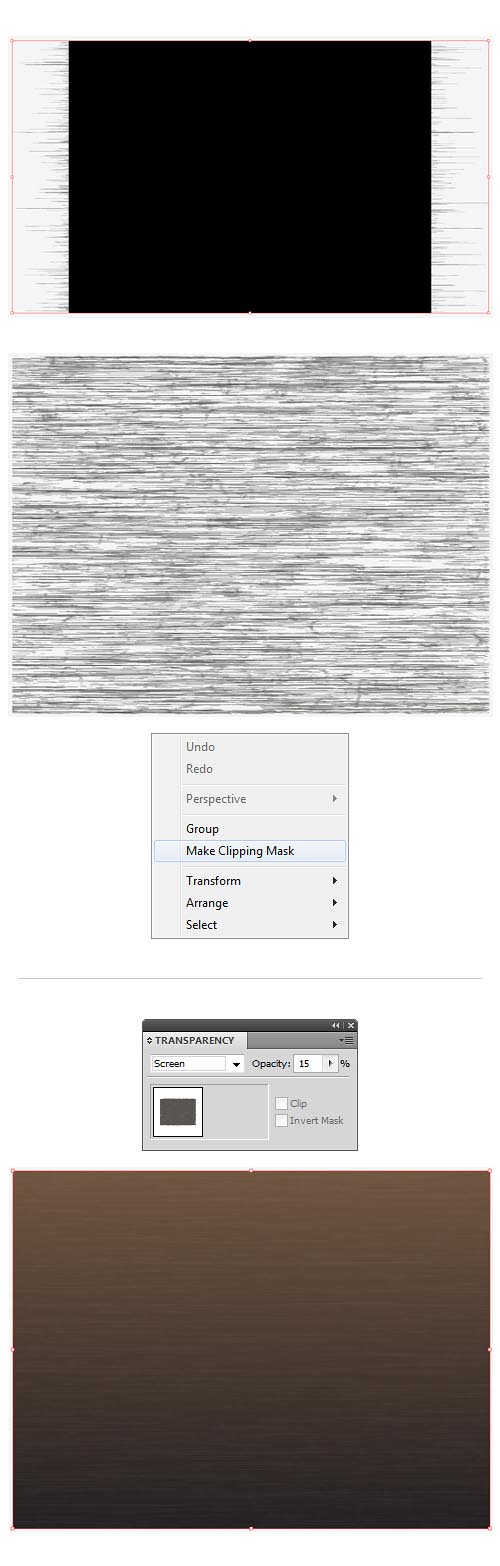
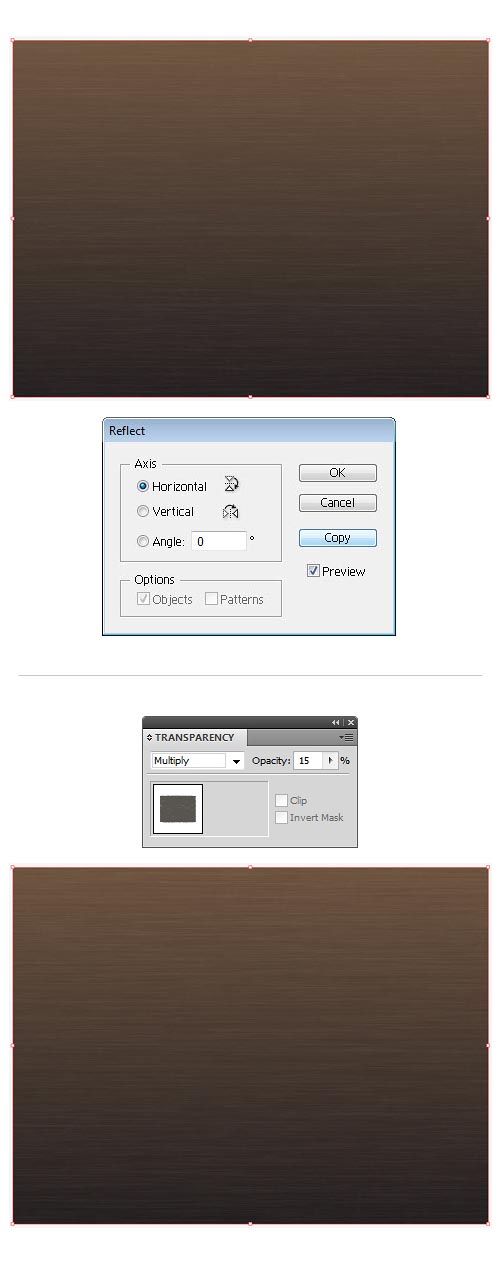
18. Select the previous shape and go to Object > Transform > Reflect to reflect the object by horizontal axis and press copy. Once we get the copy of the first texture, in the Transparency Panel change the Blending Mode to Multiply (Opacity 15%). Now we have two sets of scratches, the bright scratches and the darker ones.
19. Pick the Ellipse Tool (L) and make an ellipse with size of about 1310 x 810 pixels and fill it with radial gradient. Click on the left color stop and change the opacity to 0%. Do the same for the right stop, but now lower the opacity to 75%. Mask the ellipse the same way we described in the previous steps (refer to step 17). Make sure the mask retains the same dimensions as our background (800×600 px). When the mask is finished, in the Transparency Panel change the Blending Mode to Color Burn (Opacity 100%). Place the object above everything else on that layer.

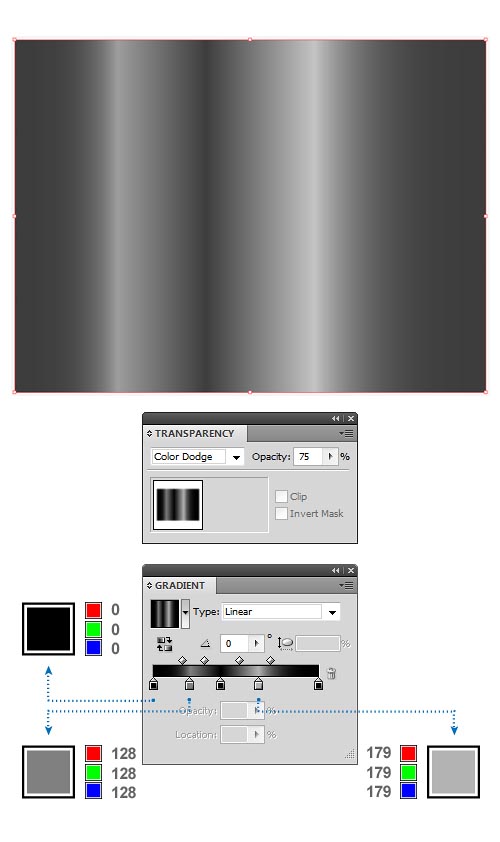
20. We’re almost done. To get realistic metal texture, we want to add some light reflections on the metal structure. Create another 800×600 px rectangle and fill it with linear gradient. Add 5 color stops, but only 3 colors: black (R:0 G:0 B:0), light grey (R:179 G:179 B:179) and mid-grey (R:128 G:128 B:128). Open the Transparency Panel and change the Blending Mode to Color Dodge (Opacity 75%).
21. Keep the previous object selected and go to Effect > Blur > Gaussian Blur. Enter a 10px radius then click OK. Since we will inevitably get blurred object whose edges exceed the boundaries of our background, add a clipping mask to hide the edges. Bring the object above every item we placed in our Artboard.

22. OK, we’re almost done. Bring our text effect and the background together first. Select the text and go to Effect > Stylize > Outer Glow and enter the values when dialog box opens. We want to add some dark shadows to our text, so there is an interaction between text and background.
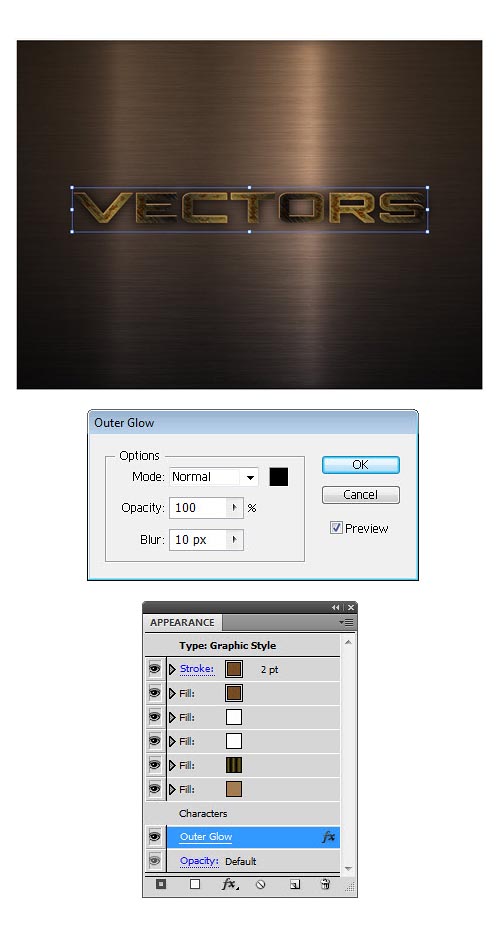
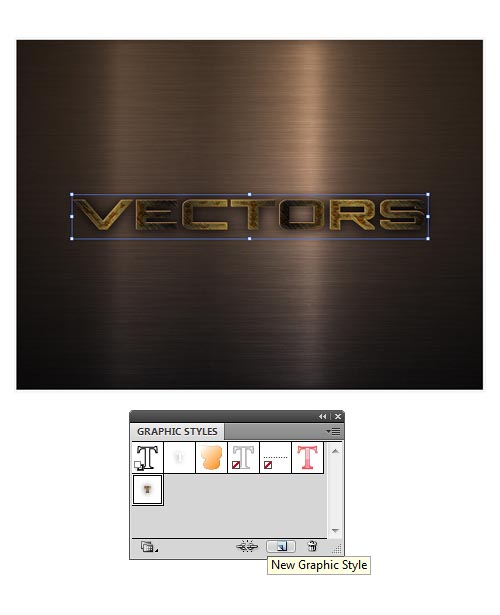
23. If you applied the Outer Glow effect, activate Graphic Styles Panel (Shift+F5). Keep the text selected and click on the New Graphic Style. Now you can apply that style to any font you like.
To download the source file for this tutorial, you will need to login as a member.
Sign up today to access all exclusive members content!

Thanks for the tutorial! very informative. I like the step-by-step guide.
Solid yaar
thank you, this tutorial is very good.
But now I realize that illustrator is really
a very slow piece of software.
Very nice! Thanks!
NGA NGA AKO D2
Excellent tutorial! Svaka cast za rad i ideju!
legislation relating to Sequestration is dealt with at state
level; There where you volition also chance videos of your favorite funniness programmes.
Step 14 didn’t work. I could not make tracing options appear – all gray = not applicable 🙁
Figured out step 14 (had to have the sub-layer selected… but had other problems along he way. Would be helpful to have more specific info about which sub-layer to select at EVERY step of the way. Also in the beginning we see the Appearance screen but later in some steps this info is missing. Feels like the first steps were written for beginners (which is good) but later the descriptions start skipping a few things, as if it has beed written for more advanced users.