

Read this illustrator tutorial to learn how to draw a professional drums kit from scratch. By the end, you will know how to make a tripod stand, drums, different types of cymbals and also how to create the texture for the drums. Hope you will find this easy to follow and useful. Enjoy.
Draw the Tripod Stand
1. Open a new web document. First, to make the stand’s tube, take the Rectangle Tool and draw a long rectangle then open the Swatch Libraries Menu > Gradients > Metals and use Steel to fill the shape. Next draw the other shape that you see in the image below using the Pen Tool, fill it with the same gradient and then draw a flat oval with the Ellipse Tool, fill it with a dark gray and send it to back. Place all the shapes like in the image:
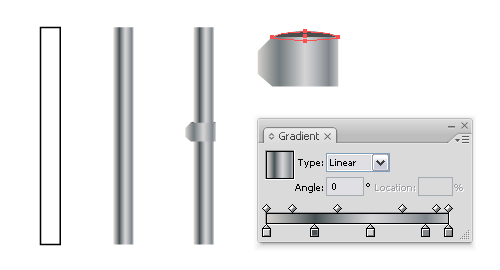
2. Draw more shapes like above and place them as you see in the next image depending on how tall you want the stand to be or how many segments you want it to have.
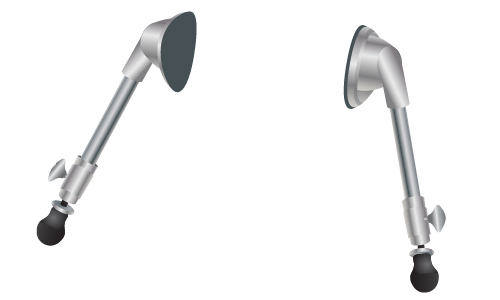
3. To draw the “legs” of the stand, start by drawing with the Pen Tool the shape from below then Copy and Paste it in back. Move it a bit up and to the left and change the fill to a gradient using darker gray tones then the metal one used for the top shape.

4. Take the Pen Tool and draw the next shape and fill it with a linear gradient from a dark gray to black and add 4 black lines on top. You can see in the image the other ends for the 3 legs of the stand.

Here is how the legs should look like at this point:
5. Now, draw using the Rounded Rectangle Tool a long rectangle then Copy and Paste it in back, move it a bit up and to the right and change the fill gradient to a darker one like earlier. Draw also a small circle on top and fill it with a similar gradient.

6. Next draw 3 rounded rectangles and place them like in the image below then select them all and click Add to shape area and click Expand from the Pathfinder Panel to obtain the shape in the right.

7. Fill the shape with a linear gradient similar to the one used so far and also paste the shape in back and draw the circles like before at step 5.

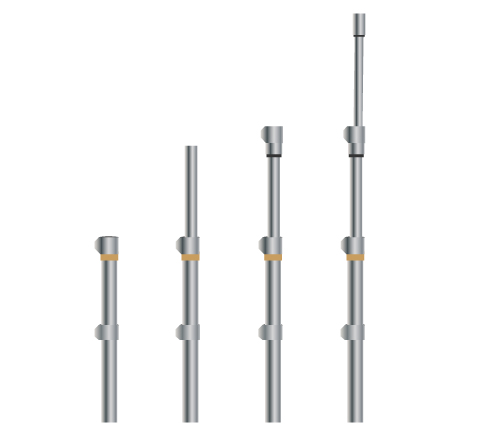
8. In the next image you can see how to place all the shapes made above:
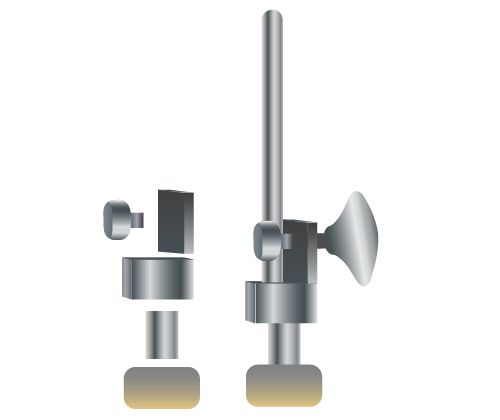
9. Draw with the Pen Tool the shape that you see below then go to Effect > Stylize > Round Corners and select a 3 px radius then fill it with a linear gradient using light and dark gray tones like in the image just adjust the angle value. Draw also a small black rectangle behind.

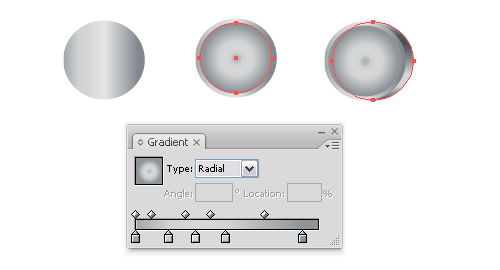
10. Take the Ellipse Tool and draw a circle then a smaller one inside filled with a similar gradient to the one above just lighter and radial. Copy and Paste in back the first circle, move it a bit to the right and change some of the gradient tones to darker ones.
11. Here is how the stand should look so far:

12. Next copy all the shapes made earlier at step 10 then draw with the Pen Tool the selected shape in the image behind them. Also add a small piece of tube and one adjusting button made at step 9.

Draw the Cymbals
13. Let’s continue with the cymbals so take the Pen Tool, draw the shape in the image and fill it with a golden linear gradient. Colors used by me are: (R=240,G=226,B=190), (R=228,G=199,B=128) and (R=213,G=179,B=130). Next draw the second shape on top and fill it with the same gradient just change the angle so they don’t look the same.

14. To make the transition smoother between the 2 shapes made above draw using the Pen Tool a shape similar to the one in the next image then go to Effect > Blur > Gaussian Blur and select a 2 px radius value.

15. Now take the Rounded Rectangle Tool, draw a rectangle and fill it with a linear gradient using brown tones and draw 6 smaller ones and fill them with a linear gradient from (R=84,G=59,B=42) to (R=200,G=157,B=95) that you can see in the image below. Group all the shapes.

16. Place the group like in the next image then to make the reflection on the cymbal go to Object > Transform > Reflect, select Vertical and click Copy. Next Copy and Paste in front the top part of the cymbal, select both the brown rectangle and the pasted shape and click Intersect shape areas > Expand. Also with the Direct Selection Tool select just the 2 corner points indicated in the image and move them a bit towards each other. See in the image the final result with the Opacity reduced to 35%.
17. Here is how the first type of stand with the cymbal looks like:
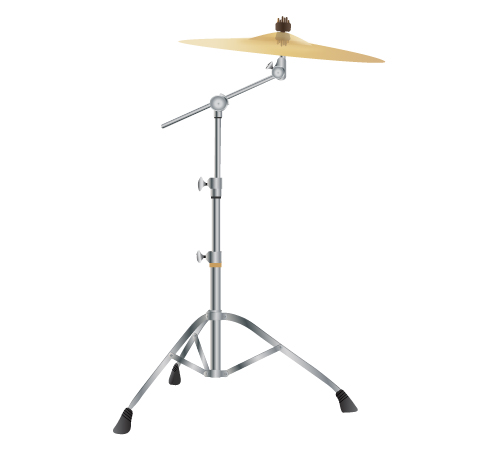
In the image below there are other 2 stands made with the same shapes drawn so far.

18. Next draw the first 2 metal shapes in the image then copy the second one and place it like below (the black shape), select both and click Subtract from shape area > Expand to obtain the third shape in the image. Using Add Anchor Point Tool add the 2 points shown then with the Convert Anchor Point Tool drag handles for each point and move them a bit to the left to obtain the curved sides. Place this shape on top of the first one, Copy and Paste it in back, change the fill gradient to a darker one and drag the sides using the Selection Tool to make it bigger. Next draw all the other simple shapes just using Ellipse Tool and Rectangle Tool.

19. Drawing the second type of cymbal is similar to the first one. After you draw the first 2 shapes, Copy and Paste in back the smaller one inside and drag some points using the Direct Selection Tool to make it lightly bigger then apply a 4 px Gaussian Blur.

In the next image you can see how the second type of cymbal looks like:

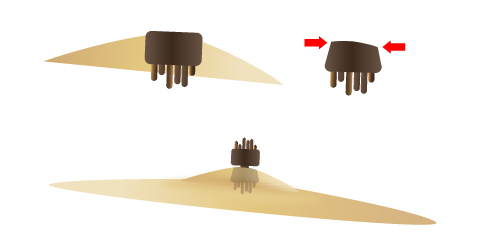
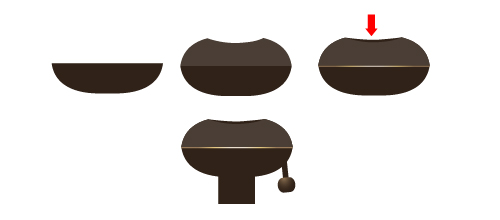
20. Next draw the first shape from below then go to Object > Transform and reflect it vertically then use an oval to Subtract the top side like in the image. Copy and Paste in back this shape, change the fill color to a dark brown and move it a bit up then just draw the other simple shapes using Ellipse Tool and Rectangle Tool. When you are done group all the shapes, you will use them later again.
21. Here is the group of shapes placed on top of the third type of cymbal and you can easily make it using shapes similar to the ones drawn so far with the Rounded Rectangle Tool and the Ellipse Tool.
22. In the next image you can see how to place all the shapes made above. To make the double cymbal just copy one made earlier and reflect it vertically. Make the top reflection like at the step 16 and for the bottom reflection copy the group made at the step 20, go to Effect > Warp > Squeeze and set the values like in the image below. Then apply an Opacity Mask or just reduce the Opacity for both of them.


Drawing the Drum Sticks
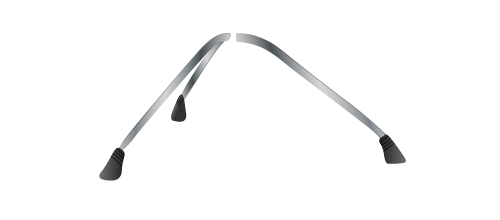
23. To make the sticks take the Rounded Rectangle Tool and draw a long rectangle then using the Direct Selection Tool move the 2 points shown in the image a bit to the right then close to each other. Now go to Object > Path > Add Anchor Points and add some more points then move them and adjust the path like below.

24. For the tip, simply draw an oval an fill it with a radial gradient from white to light gray. The sticks should look like this:

Drawing the Drums
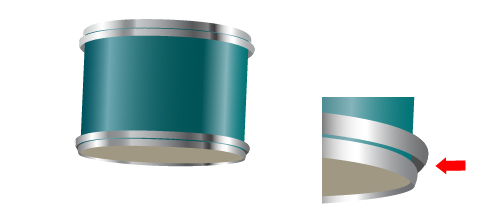
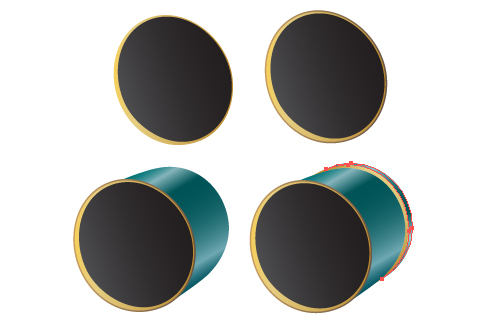
25. Start by taking the Rounded Rectangle Tool and drawing a rectangle. Next take the Ellipse Tool and draw an oval like the red one in the image then delete just the upper point and modify the path like you see below. Select both shapes and click Intersect shape areas/Expand then do the same for the top part of the rectangle. Colors used for the gradient are: (R=0,G=83,B=95), (R=110,G=168,B=178), (R=0,G=84,B=87), (R=133,G=180,B=187) and (R=0,G=115,B=118).

26. Now draw the shapes that you see below and Subtract from shape area and Expand to obtain the ones from the right. Fill them using a metal gradient.

27. Do the same for the bottom and also draw an oval to fit the metal parts, fill it with dark gray and send it to back like shown in the image.
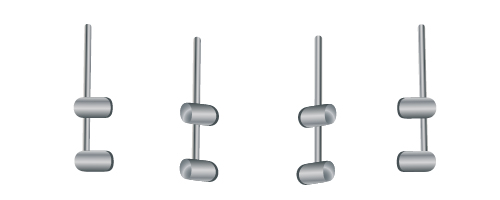
28. For the next elements, draw the black shape and fill it with a metal gradient also. Take the Ellipse Tool and draw a circle on top like the red selected one then Copy and Paste in back the first shape, change the fill to dark gray and move it a bit down. Group all the shapes, duplicate, draw the long rounded rectangle and place them all like below:

Here are other examples having different angles depending on their position on top of the drum.
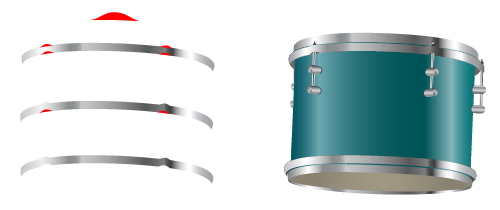
29. Before you modify the metal shape, Copy and Paste it in back and change the fill color to dark gray. Next take the Pen Tool and draw the red shape, make more copies and place them like below. Select the metal shape and the 2 little red shapes from above and click Add to shape area and Expand then select again the metal shape obtained and the other 2 red shapes from below and click Subtract from shape area and Expand. Now place all the elements made at the previous step between the modified metal shape and the one pasted behind.
Do the same for the bottom part of the drum.
Drawing the Texture
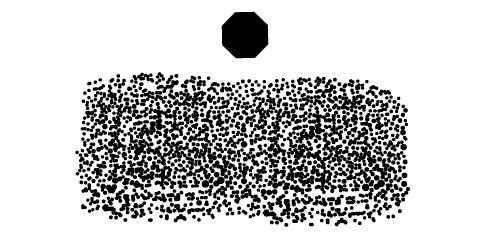
30. To create the drum’s texture take the Polygon Tool and draw a black shape like in the image then drag it to the Symbols Panel. Now take the Symbol Sprayer Tool, start spraying and don’t stop until you have many many dots like below (the symbol should be very small). You can also use the Symbol Sizer Tool if you want the dots to have different sizes. When you are done go to Object and Expand and also in the Symbols Panel click on the Break Link to Symbol option.
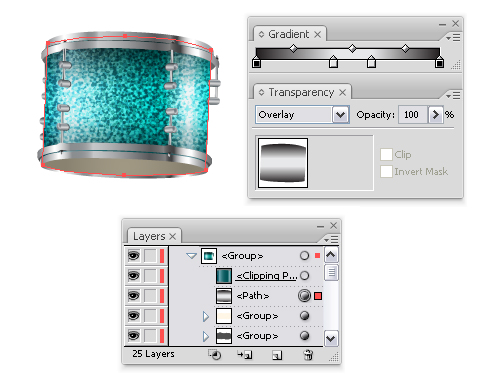
31. Place the texture on top of the drum, Copy and Paste in front the shape of the drum made at step 25, select both the pasted shape and the texture group and go to Object > Clipping Mask > Make (the drum shape should be on top). Copy and Paste in front the texture, flip it vertically so the dots don’t overlap, change the fill color to cream or white then set the Blending mode to Soft Light and lower the Opacity to 70% for both groups.

32. Copy and Paste in front of the texture groups the drum shape again and fill it with the gradient in the image using black and white then set it to Overlay.
Here are other 2 drums made in the same way:

Drawing the Bass Drums
33. Start by drawing 3 ovals. Fill the first one with a linear gradient from a dark gray to black, the second one with a linear gradient using (R=245,G=207,B=92), (R=229,G=205,B=128), (R=186,G=137,B=46) and for the third one in the back use (R=200,G=157,B=95) and (R=105,G=84,B=69). Next draw the shape for the body and use the same green gradient as before to fill it then use 2 of the ovals made and Subtract from shape area to obtain the bottom of the drum.
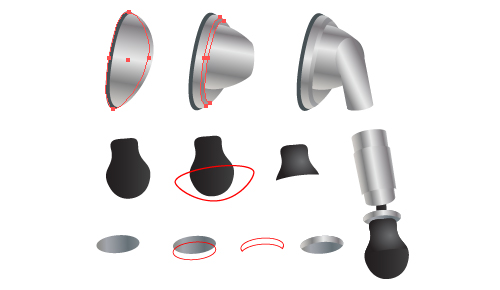
34. In the image below you can see some holding elements that you can draw using the Pen Tool and also use again the shapes made at step 28.

35. To make the “legs” of the bass drum take the Pen Tool and draw the first shape from below and fill it with a metal gradient then Copy and Paste it in back, move it a bit to the left and change the fill color to dark gray. Use similar 2 shapes and Subtract from shape area and Expand to obtain the selected stripe then draw the other 2 shapes that you see in the image.
Next take again the Pen Tool and draw the black shape then the red one on top, select both and click Subtract from shape area and Expand then place the obtained shape on top of the black one and change the fill to a radial gradient from gray to black.
Now take the Ellipse Tool and draw an oval then another one on top, select them both and Subtract again to obtain an edge.You can see in the image how to place all the shapes made.
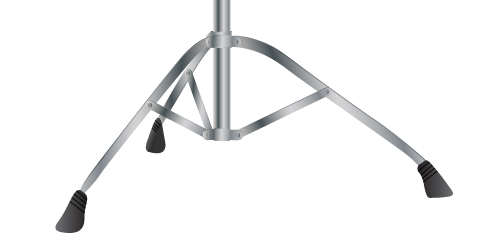
Here is the entire “leg” and the other one made in the same way:
36. The bass drum with all the parts made above and the texture should now look like this:

The final image
The work is done and hope you enjoyed this tutorial. The final image of the drums kit looks like this:

To download the source file for this tutorial, you will need to login as a member.
Sign up today to access all exclusive members content!

good work you done.
Good tutorial BUT WRONG .ZIP FILE!!! There is a Retro Television (9384-retro-television) .AI file. Fix it, please.
Fixed it. Pls redownload again.
Thank you 🙂
amazing
Wedding photography is the photography of activities relating to weddings.Wedding is a ritualistic way of expressing your love.
Good tutorial BUT WRONG .ZIP FILE!!! There is a Retro Television (9384-retro-television) .AI file. Fix it, please.
Thank got
cool
Simply brilliant tutorial which you have share with us. I appreciate your efforts for improving our illustrator skills…