
In this tutorial, I will show you how to create a Polaroid robot illustration for my past t-shirt graphic project. Drawing this illustration is pretty easy. I am not going to use a lot of gradient so the graphic is easier to print on t-shirt. You just need to know the basic of using pen, shapes, and pathfinder, the rest are just patience and happy thought. Please enjoy~
Requirements: Adobe Illustrator
What will you get?
- Instant download of PDF e-book
- Detailed step by step tutorial
- Learn the techniques to draw a robot in illustrator
- Comes with Ai file for easy reference
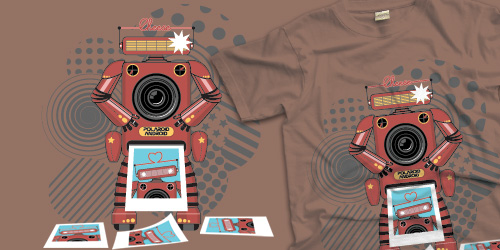
Tutorial Preview:
19. Drawing the legs is easy as 1, 2, 3. Just use previous methods and tricks. Draw the basic shapes first, using shapes and Pen Tool. Then, add a shadows and highlights. And finally, put simple shapes as details. Don't forget to group the whole leg and clone it to be the robot's left leg.

20. As you can see at the screenshot below, the robot is a bit unbalance between the top and bottom part. So I decided to add jets as another detail. First, make a basic shape, then add shadows and details using pen and star tool.

21. Clone the jet and put them at the waist part of the body. Well done, the legs and jets are done! But wait, the legs are a bit weird, aren't they? Don't worry, because we will cover it by photograph in the next step.

22. Make a new layer. Name it: Girlfriend. We are going to make the polaroid photograph come out of the belly. Draw the photo paper on top of the droid using rectangle tool. Modify its path to create a perspective. Then select it and offset the path (Object > Path > Offset Path). Set the offset to about -8 px. Modify the path again and color it blue, #72CDDF. See the screenshot.

23. At the Layers panel, clone the head, body, and arms part of the droid (drag and drop at the Create New Layer button). Then put them as one layer at Girlfriend layer. Then group them (select the layer then press Ctrl + G). Delete the rest blank group. Resize the droid's girlfriend to fit the blue part of photo paper.

... end of preview. Sign up for premium membership to read the whole tutorial!


Nice shiny robot dude! Clean oldschool feel.
Hello, always i used to check website posts here in the early hours in the dawn, as i like to gain knowledge of more and more.
Excellent pieces. Keep posting such kind of info on your page.
Im really impressed by your blog.
Hey there, You’ve done a great job. I’ll definitely digg it and for my
part recommend to my friends. I’m sure they will be benefited from this site.