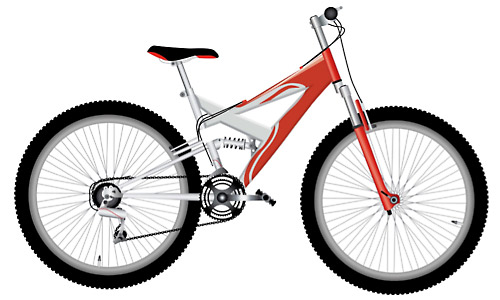

In this course, you will learn how to create an image of a bicycle. You will learn how to create the various parts and different details of the image. The tools that we used are both limited and specific. I hope that you will enjoy while learning how to create this image.
(online pharmacies that use paypal)
Difficulty: IntermediateRequirements: Adobe Illustrator
What will you get?
- Instant download of PDF e-book (18 pages, 54 steps)
- Comes with Ai file for easy reference
- Detailed step by step tutorial to draw a nice realistic Red Bike
Tutorial Preview:
Making a Pedal
45. Make a pedal by following these processes. Use the Pathfinder Tool to integrate the objects.

46. Prepare the other objects to make the pedal.

47. Draw the shape of the pedal as shown below using basic shapes tool.

48. Add the chain stay and place the pedal in its proper position.

49. Copy and shorten the gear to make a derailleur pulley.

50. Make a central axis for the cassette bicycle. Use the Pathfinder Tool to cut
holes in the shape to complete it.

51. Finish the shape by assembling it.

... end of preview. Sign up for premium membership to read the whole tutorial!


Hi this is somewhat of off topic but I was wanting to know
if blogs use WYSIWYG editors or if you have to manually code with HTML.
I’m starting a blog soon but have no coding expertise so I wanted to get advice from someone with experience. Any help would be enormously appreciated!